 Loopstack
How to make beats on a Mac
You don't need a studio to make a beat. A Mac, a pair of headphones and an hour is enough. This guide walks through the whole thing in order: tempo, drums, bass, chords, arrangement and export. It uses Loopstack Pro, but the steps are the same in any music app.
What you need
- A Mac running macOS 14 Sonoma or later. Any Apple silicon Mac is plenty.
- Headphones or speakers. Headphones are fine to start; check your beat on a phone speaker too, since that's where many people will hear it.
- A keyboard to play notes. A small USB MIDI keyboard is nice but optional: the Mac's own keyboard plays notes too (musical typing).
1. Pick a tempo
Tempo, in beats per minute (BPM), sets the feel more than anything else. Rough starting points:
- Lo-fi and boom bap: 80–95 BPM
- Hip-hop and trap: 130–150 BPM (trap often feels half-time, so 140 sounds like 70)
- House: 120–128 BPM
- Drum and bass: 170–175 BPM
In Loopstack Pro, click the BPM in the toolbar and type the number. You can change it later; loops follow.
2. Program the drums
Drums are the skeleton of a beat, so start there. Add a Drum track, pick a kit, and open the Editor to place hits on a grid of 16 steps per bar.
A pattern that works in almost every style:
- Kick on step 1, and again somewhere in the second half of the bar (try step 11).
- Snare or clap on steps 5 and 13 (beats 2 and 4).
- Hi-hats on every other step (1, 3, 5…), or every step for more drive.
Then make it yours. Add Swing so the hats lean back instead of marching, and Humanize so not every hit is the same loudness. Small changes, like a kick that moves one step later on the last bar, make a pattern sound played rather than programmed. Each drum also has its own sound controls, so you can tune the kick down or shorten the snare's tail.
3. Add a bassline
Pick a bass sound and set a key. If you're unsure, A minor or C minor are safe, moody choices. Then play a simple part: the root note of the key on the first beat of each bar, with one or two passing notes. The bass should lock with the kick: when the kick hits, the bass usually does too.
Record it with Record (R), with a count-in so you're ready. Missed a note? That's what the piano roll is for (step 5).
4. Add chords and a melody
Pick a keys or pad sound and play three or four chords that repeat every bar or two. Four chords over four bars is the classic shape. If you'd rather not think about theory, turn on chords so one finger plays a full chord in your key, or the arpeggiator to turn held chords into a moving pattern.
Leave room. A beat isn't a finished song, and a rapper or singer needs space in the middle frequencies. Two good parts beat five busy ones.
5. Fix and tidy the notes
Open a recorded part in the piano roll to move, lengthen or delete notes. Quantize snaps notes to the grid; use it lightly, since a little looseness is what makes a part feel human. You can also change a part's sound after recording and the notes stay the same, so you're never stuck with a sound you picked in a hurry.
6. Arrange it
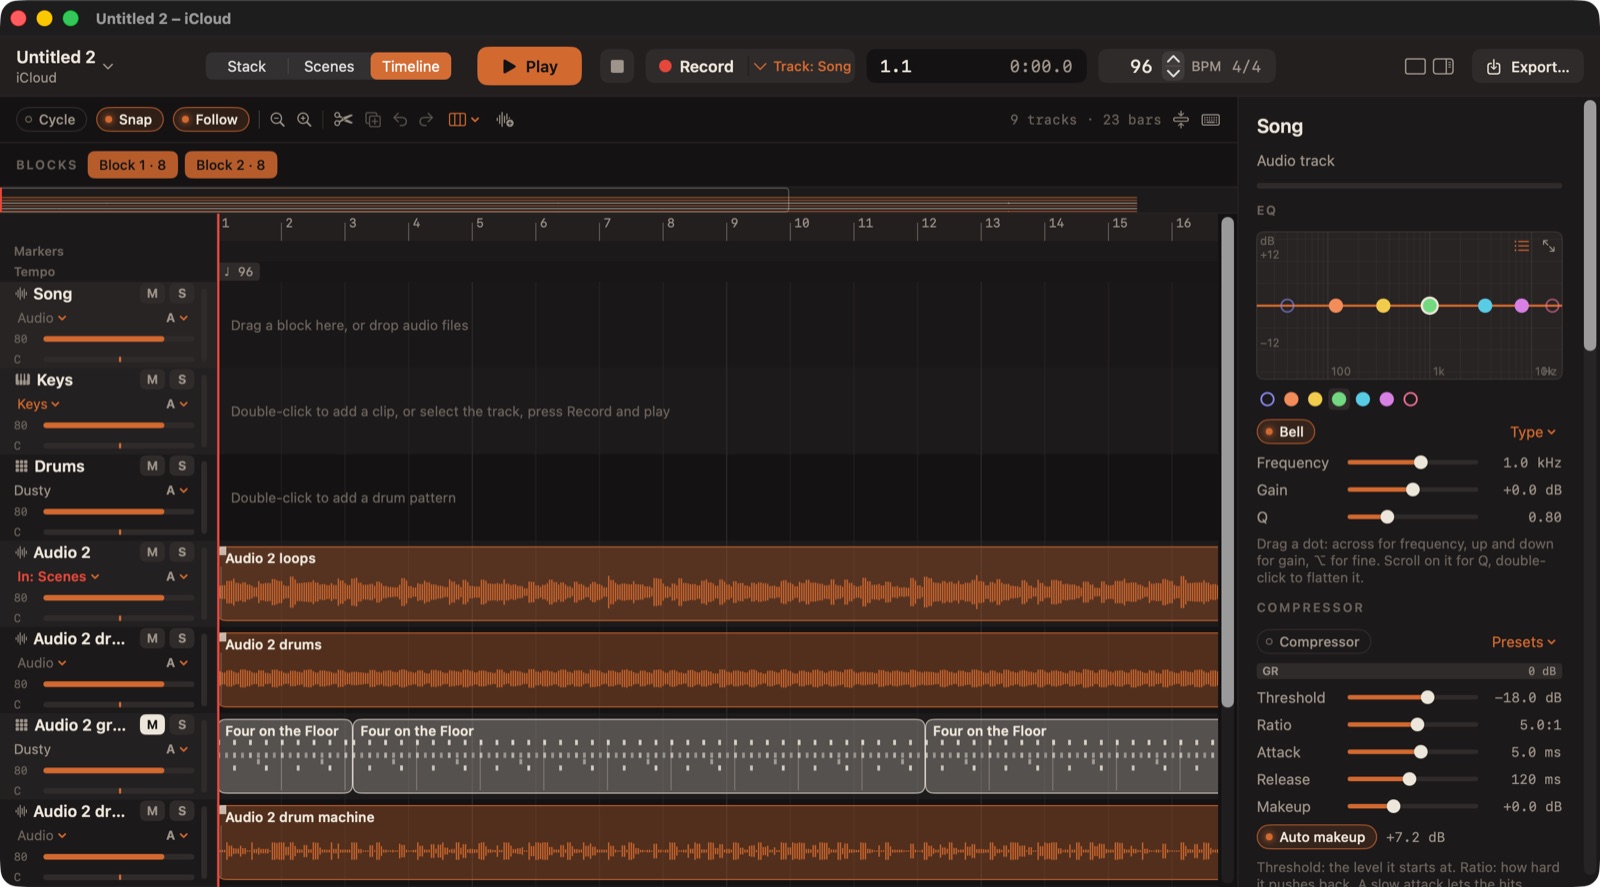
A loop becomes a beat when things come and go. Send the parts to the timeline with Send stack to timeline, then copy and mute sections:
- Intro (4–8 bars): chords alone, or drums with a filter.
- Main section (16 bars): everything.
- Break (4–8 bars): drop the kick and bass.
- Main section again, then an outro.
Something should change every 8 bars: a hat pattern, a fill, a new layer, a part dropping out.
7. Mix and export
Turn everything down so the loudest moment peaks well below the top of the meter, then balance by ear: kick and snare first, bass next, everything else around them. A touch of glue compression on the master pulls the parts together, and the loudness control brings the whole beat up to a competitive level at the end.
Export from Export… as a WAV for sharing, or as Stems (a file per track) if a vocalist or another producer will work on it. Export MIDI… gives the notes to any other app.
Common beginner mistakes
- Too many parts. If it sounds cluttered, mute things until it doesn't.
- Everything loud. If everything is loud, nothing is. Leave headroom.
- Never finishing. Export a rough version of every beat. Finished and imperfect teaches you more than perfect and unfinished.
Loopstack Pro is a music studio for Mac: drum tracks, piano roll, timeline, Audio Unit plugins and a full mixer, with projects shared with Loopstack on iPhone. Pay once, no subscription. See what's inside or read another guide.